• Skip to primary navigation
  • Skip to main content
  • Skip to footer
Digipedaohjeet

Digipedaohjeet

  • Suomi
MENUMENU
  • Home
  • Planning
        • Planning and administration of teaching
          • Digipedagogical tips for everyday e-learning
          • Design quality for module implementation
          • Show all
        • Module implementation plan
          • Design quality for module implementation
          • Quality criteria for module implementations
          • Storyboard for module implementation
          • Blueprint for module implementation
          • Feedback and development
          • Show all
        • Planning and building Moodle workspace for module
          • Learning activity or assignment template
          • Show all
        • Planning online meeting
          • Logging in to HAMK’s Zoom
          • Zoom Online Meeting Service
          • Zoom LTI Pro Activity in Moodle
          • Show all
  • Teaching and guidance
        • Online teaching and studying
          • Digipedagogical tips for everyday e-learning
          • Log in to HAMK Services
          • Quality criteria for module implementations
          • Show all
        • Online meetings
          • Log in to HAMK Services
          • Zoom Online Meeting Service
          • Joining a Zoom meeting
          • Adding Zoom Activity to the Moodle Course Area and Scheduling Meetings (Fall 2020>)
          • Zoom LTI Pro Activity in Moodle
          • Show all
        • Online exams
          • EXAM for electronic individual exams and maturity tests
          • Show all
        • Learning platforms
          • Moodle: Student’s Guide
          • Moodle’s assignments
          • Moodle’s discussion forums
          • Zoom Online Meeting Service
          • Show all
        • Online teamwork
          • Moodle’s discussion forums
          • Show all
        • Communication
          • Moodle’s discussion forums
          • Show all
        • Data protection
          • Short check list for processing personal data
          • What is personal data and specific (sensitive) personal data?
          • Filming and photography permits in teaching
          • Privacy Protection of Zoom
          • Data protection – informing the data subject
          • Show all
  • Content production
        • Video production
          • Kaltura Video Platform
          • Kaltura’s upload and share your video
          • Show all
        • Questionnaires
          • Webropol-survey and reporting tool
          • Show all
  • Content sharing
        • Sharing content
          • Kaltura’s upload and share your video
          • Funet FileSender file sharing service
  • ⬅

Add users to courses in Moodle


Kuuntele

Add users to courses in Moodle

Article sections


    Kuuntele

    You can set several keys or options to enroll in a Moodle course. Primarily, users enter courses through Peppi implementations, instruction. Other options include meta linking and using an enrollment key. 

    With the meta link, students enrolled in another course can automatically access the contents of other courses as well. By making a meta link, you can configure students in a particular course to be assigned to a specific group in a linked, new course. 

    To access the course, the teacher can also specify a key, i.e., a password, and the student can enroll to a specific course.  If there are, e.g., group assignments in the course, and the student must be involved in the group in one way or another – the student either makes the group choice himself or the teacher does it. Read more: Moodle: Groups and groupings  and Moodle: Group work . 

    The sub-course activity creates a link to another course and allows the grade formed by working in one course to be directly transferred to another course. 

    Go to the Add participants page 

    When you are in the course homepage, click on Participants in the left column. On the right-hand side cog wheel click on the enrollment methods. 

    Enrolment methods button under settings menu.

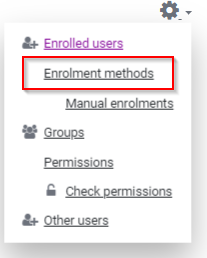
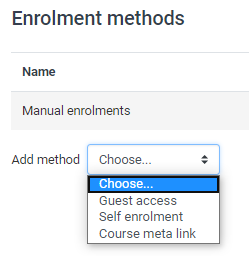
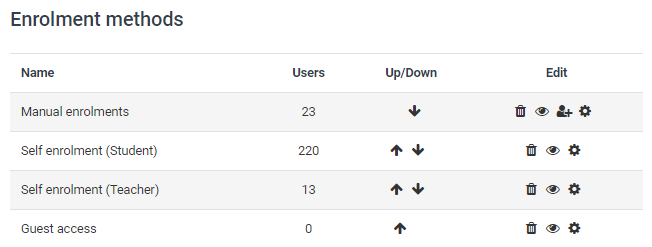
    A new page opens showing the available enrolling methods and can be edited or added from the drop-down menu if necessary. The Eye icon allows you to enable or disable the enrolling method. 

    1. Meta linking 

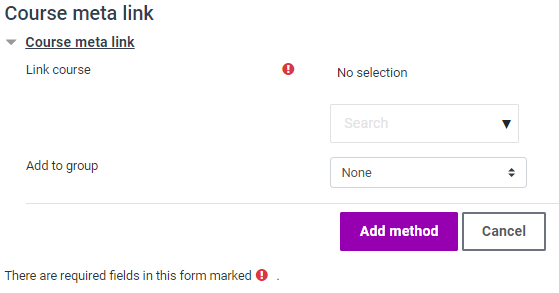
    Go to the Add participants page. Add a meta link via the drop-down menu (Select> Course meta link ). 

    Add method menu. There are three options: Guest access, Self enrolment and Course meta link.

    1. Select the course where you want include students from to this workspace. 
    2. If you want them to be automatically assigned to a specific group, you can select from Add to group. 
    • If you are creating new groups, add groupings to the groups after this so that you can easily manage different groups in the workspace later. Help: https://digipedaohjeet.hamk.fi/ohje/moodle-ryhmat-ja-ryhmittelyt/#ryhmittelyjen-luominen-ty%C3%B6tilaan


    Course meta link view.

    1. The key for the student

    A. Go to the Add participants page. If the way to add participants already includes Self-enrollment (Student), edit it via the cog wheel icon and change the desired course key. If the participant insertion method is dimmed, the insertion method is not enabled. Press the eye icon to activate the insertion method. 

    enrolment methods view.


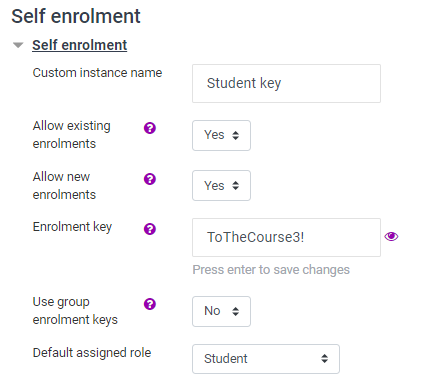
    Clicking the cog wheel icon opens a settings page where you can edit the settings later. 

    1. Enter a descriptive name for the registration method. 
    2. Specify the course key. NOTE. The key must have at least one uppercase letter, one lowercase letter and one special character. 
    3. The Define Role option defines the role of registered users. The default is student. 
    4. If you wish, you can also create a welcome message for students that they will see when they join as a course member. 

    B. Always remember to save changes. If the Self-Registration (Student) registration method is not found in the list, you can add it via the drop-down menu (Select> Self enrolment ). Specify the information according to section A.

    Add method menu. There are three options: Guest access, Self enrolment and Course meta link.

    Self enrolment view.


    NOTE! To allow any Moodle user to enroll for the course, enable self-enrollment, but do not add a course key. If you want to limit the course to a specific group, you must specify the key and notify them separately. 

    1. Adding an individual user

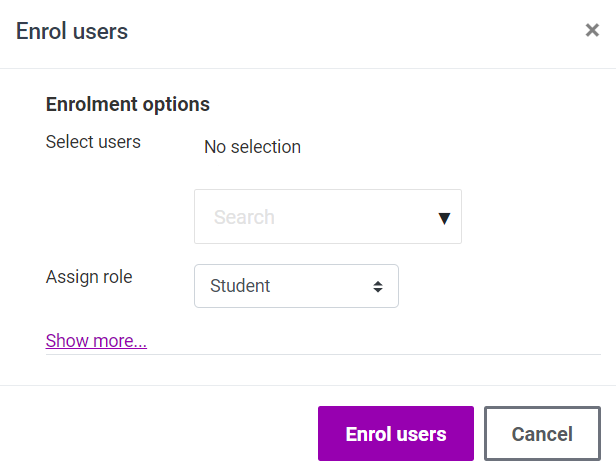
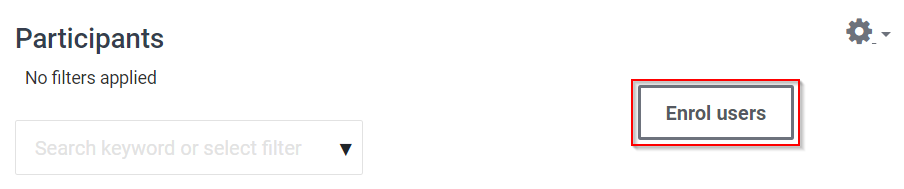
    An individual user (e.g., a visiting teacher) can also be added to the workspace manually. When in the workspace, in the Navigation section, select Participants. On the participants page, click the Enrol users  button. 

    Enrol users button.


    In the search box, type the name of the user you want to add and press to add the desired user from the list of users suggested by Moodle to the correct user information. In addition to the name, the user sees an e-mail address. People may have the same name or may have an expired ID, so be careful. You can add as many users as you need at one time. 

    Finally, click Enrol users

    Enrolment options. There is a search bar for user and assign role dropdown list. There is a enrol users button at the bottom.


    Last Updated: 7 months ago
    in Moodle
    Tags: design and build in Moodle
    Oliko artikkeli hyödyllinen?

    Related Articles

    • Building a Moodle workspace: adding assignments and content
    • Adding users to Moodle workspaces
    • H5P tasks can be used flexibly from the content bank
    • Moodle evaluation matrix
    • Moodle groups and groupings

    Footer

    Häme University of Applied Sciences
    (HAMK) / PO Box 230 13101 Hämeenlinna Finland
    03 6461
    HAMK@HAMK.FI

    Privacy policy
    Cookies
    Takedown request
    Accessibility summary
    Site map

    cc-lisenssi

    This material is CC licensed Attribution-ShareAlike 4.0 International.