Kaltura’s upload and share your video

Article sections
You can upload video to Kaltura video in various file formats by using the Media Upload feature.
Use Media Upload when:
- you want to upload and share a video in Kaltura.
Quick guide:
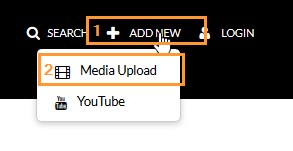
- Click Add New> Media Upload at kaltura.hamk.fi. Sign in to Kaltura.
- Accept the terms of service and select the file to upload.
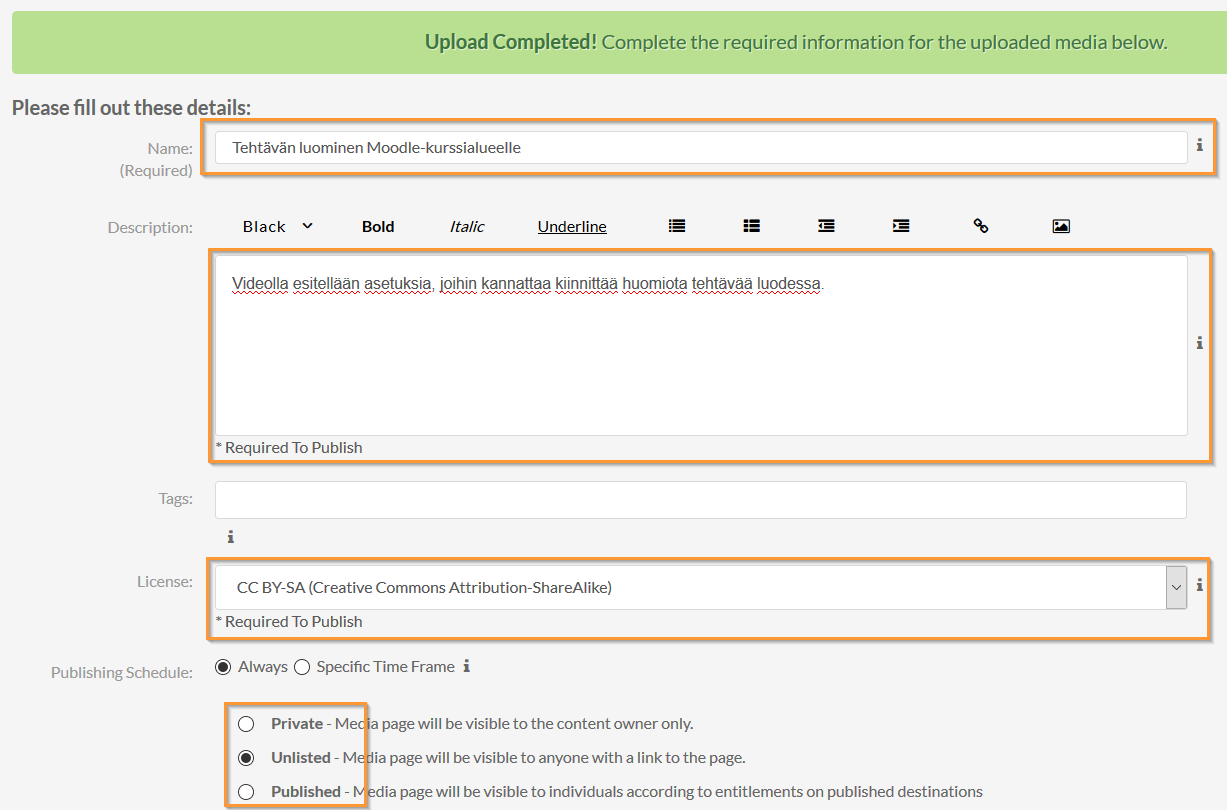
- Fill in the video information (title, description, license at minimum) and save.
- Share the link or publish a video on kaltura.hamk.fi.
Uploading the video
1. At kaltura.hamk.fi select Add New> Media Upload. Log in to the service with short version of HAMK usename if necessary.
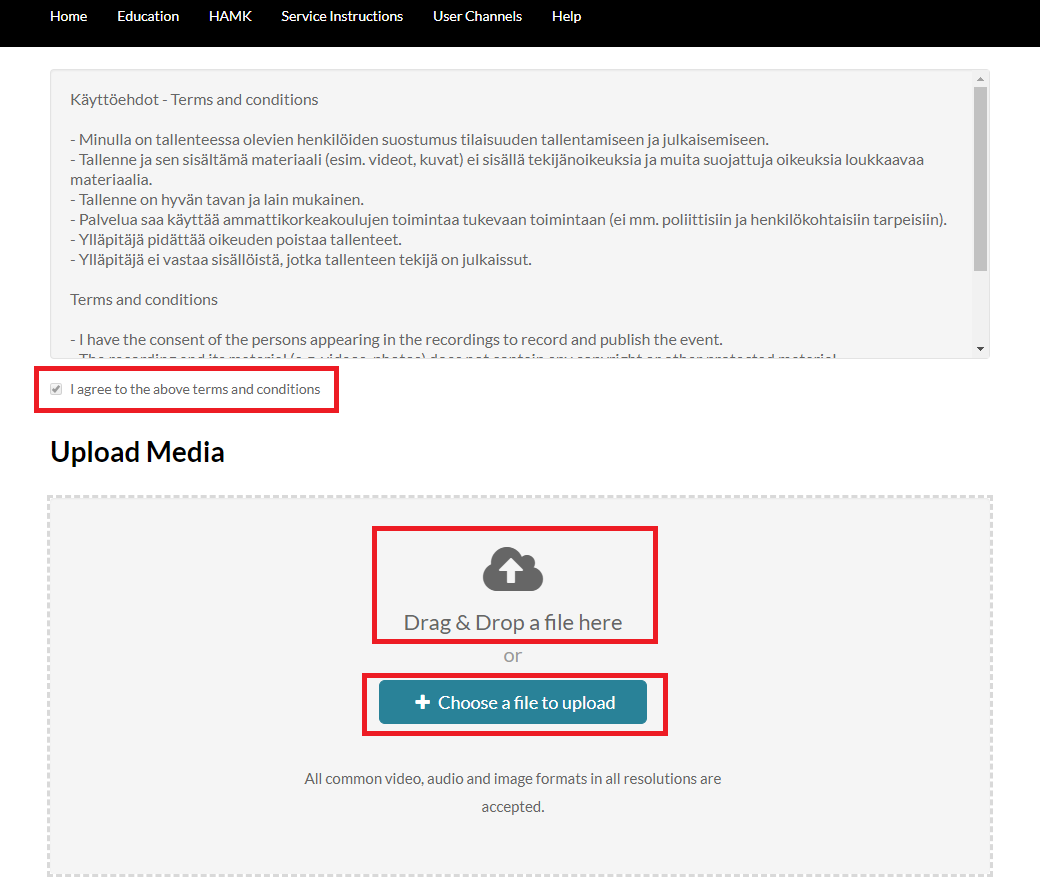
2. Read and accept the terms and conditions. Select the file to be uploaded by pressing the “Choose a file to upload” button.
3. Fill in the video information (title, description, license at minimum) and press Save. You can save the video first for yourself (private) or as a hidden video (unlisted).
- It is recommended to use CC-license CC-BY-SA in Hamk’s educational materials. Learn more about CC licenses.
- As an additional option you can limit the viewing time of a video to a specific time interval, but usually there’s no need for such.
- Note that you can also upload another video at the bottom of the page.
Sharing the video
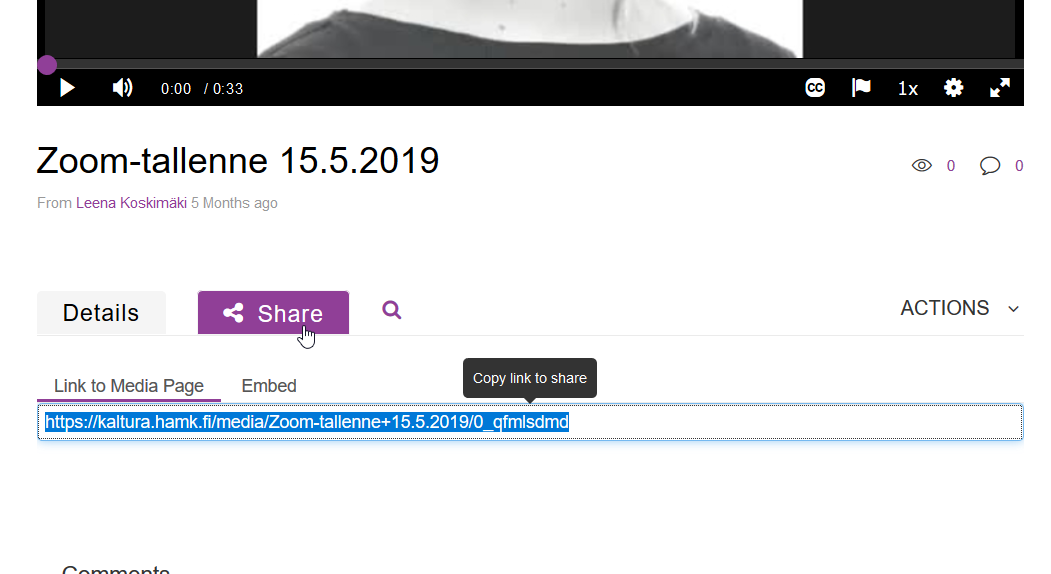
- You can link or embed the video by using Kaltura’s Share functionality on the video’s page. The video must be in unlisted or published mode in order to others can watch the video, for example, when linked to another web page.
- You can display the video in the Moodle course area as Kaltura Video Resource (instruction in Finnish). In this case the level of publicity can be anything. At the bottom of the page you will find more detailed information about the publishing options and levels of publicity.
Publishing the video to kaltura.hamk.fi
You can make a video public (visible and searchable through HAMK Kaltura) or publish it in a public category or on a public channel in Kaltura.
Right after uploading
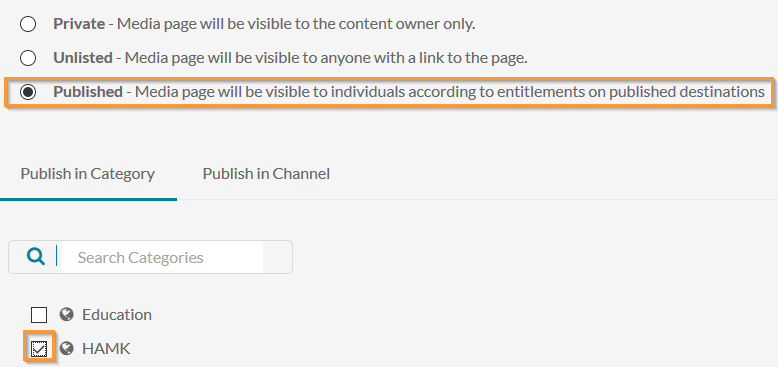
Once you’ve uploaded the video to the service and saved the video as private or unlisted, you can then publish the video by switching video’s publicity to Published.
To publish to a category (such as Research or Education) or channel: you can select a previously dimmed Published option and select or search for a category from the category list that appears below. Similarly, you can also publish your video to a channel.
Publish a video in a category or channel later
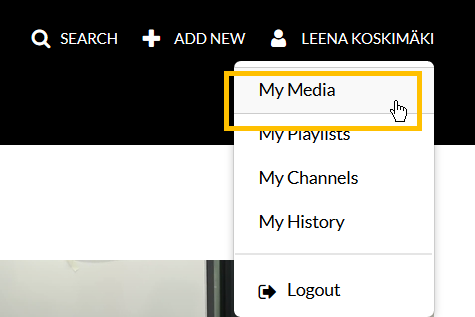
Click you name in the upper right corner. Choose My Media.
Select the correct video from the list and select Publish from the Actions menu.

From publicity options choose Published. Press Save. You can now publish the video to a category or channel. Select or search for a right category or channel from the list that appears below.
- NOTE: Students will be able to publish to channels only.
Video Publicity Options:
- Private – Media page will be visible to the content owner only.
- Unlisted – Media page will be visible to anyone with a link to the page.
- Published – Media page will be visible to individuals according to entitlements on published destinations

