• Skip to primary navigation
  • Skip to main content
  • Skip to footer
Digipedaohjeet

Digipedaohjeet

  • Suomi
MENUMENU
  • Home
  • Planning
        • Planning and administration of teaching
          • Digipedagogical tips for everyday e-learning
          • Design quality for module implementation
          • Show all
        • Module implementation plan
          • Design quality for module implementation
          • Quality criteria for module implementations
          • Storyboard for module implementation
          • Blueprint for module implementation
          • Feedback and development
          • Show all
        • Planning and building Moodle workspace for module
          • Learning activity or assignment template
          • Show all
        • Planning online meeting
          • Logging in to HAMK’s Zoom
          • Zoom Online Meeting Service
          • Zoom LTI Pro Activity in Moodle
          • Show all
  • Teaching and guidance
        • Online teaching and studying
          • Digipedagogical tips for everyday e-learning
          • Log in to HAMK Services
          • Quality criteria for module implementations
          • Show all
        • Online meetings
          • Log in to HAMK Services
          • Zoom Online Meeting Service
          • Joining a Zoom meeting
          • Adding Zoom Activity to the Moodle Course Area and Scheduling Meetings (Fall 2020>)
          • Zoom LTI Pro Activity in Moodle
          • Show all
        • Online exams
          • EXAM for electronic individual exams and maturity tests
          • Show all
        • Learning platforms
          • Moodle: Student’s Guide
          • Moodle’s assignments
          • Moodle’s discussion forums
          • Zoom Online Meeting Service
          • Show all
        • Online teamwork
          • Moodle’s discussion forums
          • Show all
        • Communication
          • Moodle’s discussion forums
          • Show all
        • Data protection
          • Short check list for processing personal data
          • What is personal data and specific (sensitive) personal data?
          • Filming and photography permits in teaching
          • Privacy Protection of Zoom
          • Data protection – informing the data subject
          • Show all
  • Content production
        • Video production
          • Kaltura Video Platform
          • Kaltura’s upload and share your video
          • Show all
        • Questionnaires
          • Webropol-survey and reporting tool
          • Show all
  • Content sharing
        • Sharing content
          • Kaltura’s upload and share your video
          • Funet FileSender file sharing service
  • ⬅

Installation of Kaltura Personal Capture


Kuuntele

Installation of Kaltura Personal Capture

bannerikuva kaltura

Article sections


    Kuuntele

    Installing Kaltura Personal Capture

    With this instruction, you can install the Kaltura Personal Capture screen capture application on your computer.

    Here you can find the application’s actual user manual.

    Installing the tool on HAMK’s computer

    Install Kaltura Personal Capture from the Software Center. The video files are automatically saved in the Videos folder on the C drive. You are ready to start recording!

    Installing the tool on your own device

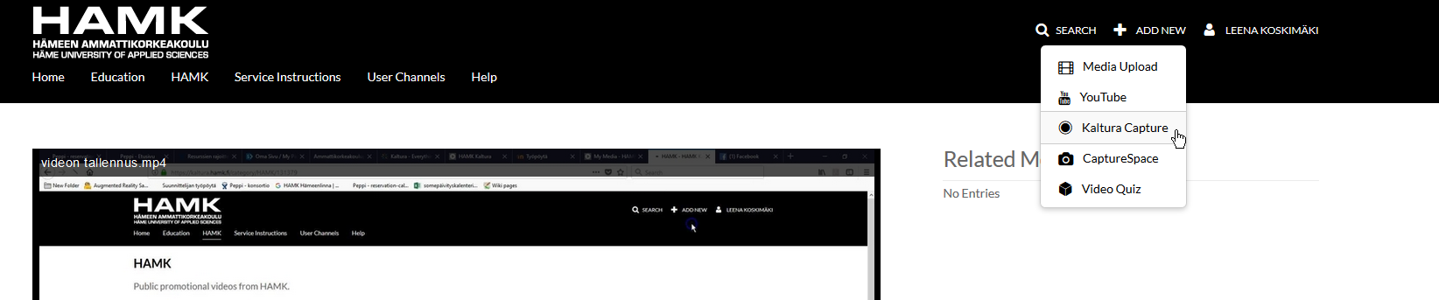
    You can start the installation of the Kaltura Capture tool by logging in to kaltura.hamk.fi and selecting the Kaltura Capture function that opens from the Add new button.

    The Kaltura Capture button below the Add New button.

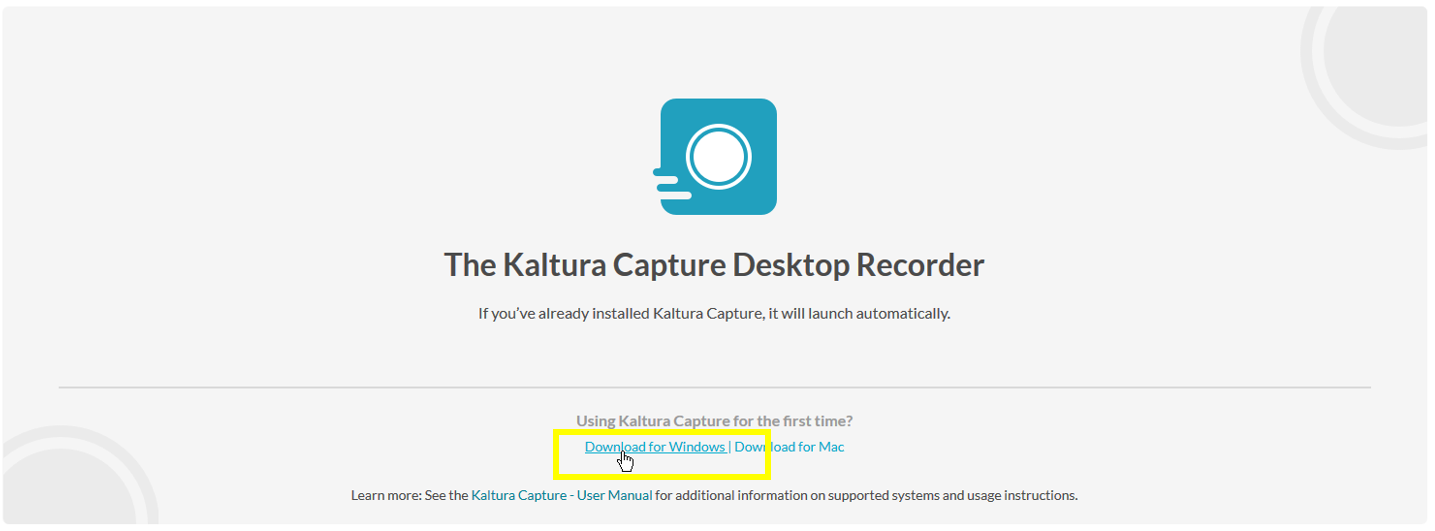
    Accept the terms of use of the service on the page. Below the Using Kaltura Capture for the first time text you will find the download option for PC and Mac.

    Download for Windows link to download Kaltura Capture Desktop Recorder.

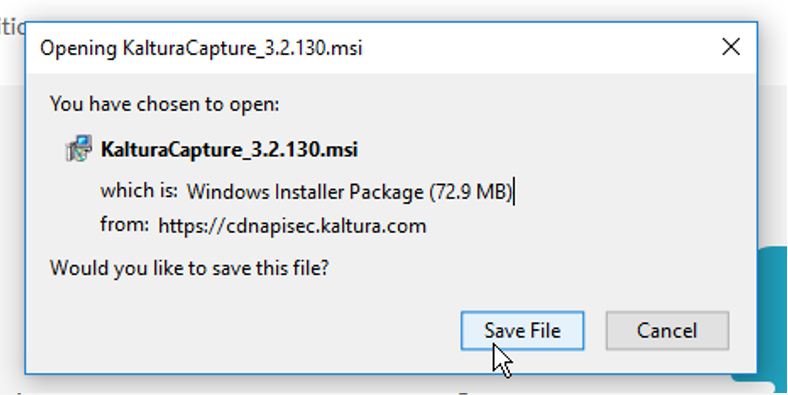
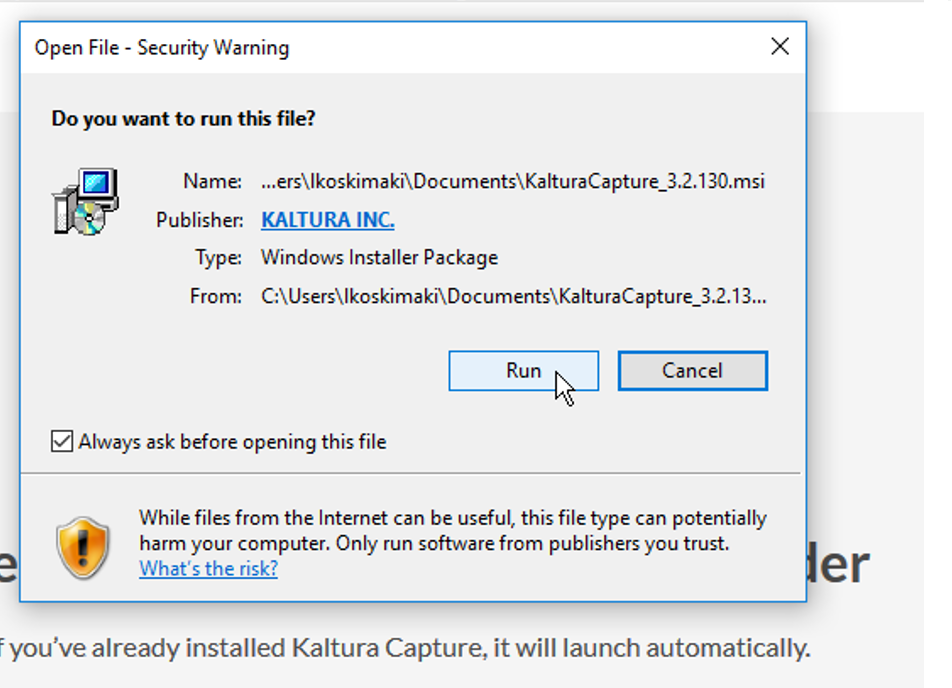
    Save and run the file.

    Save File button to download the Kaltura Capture file to the computer.
    A window asking if the user wants to start the Kaltura Capture file. The window has Run and Cancel buttons.

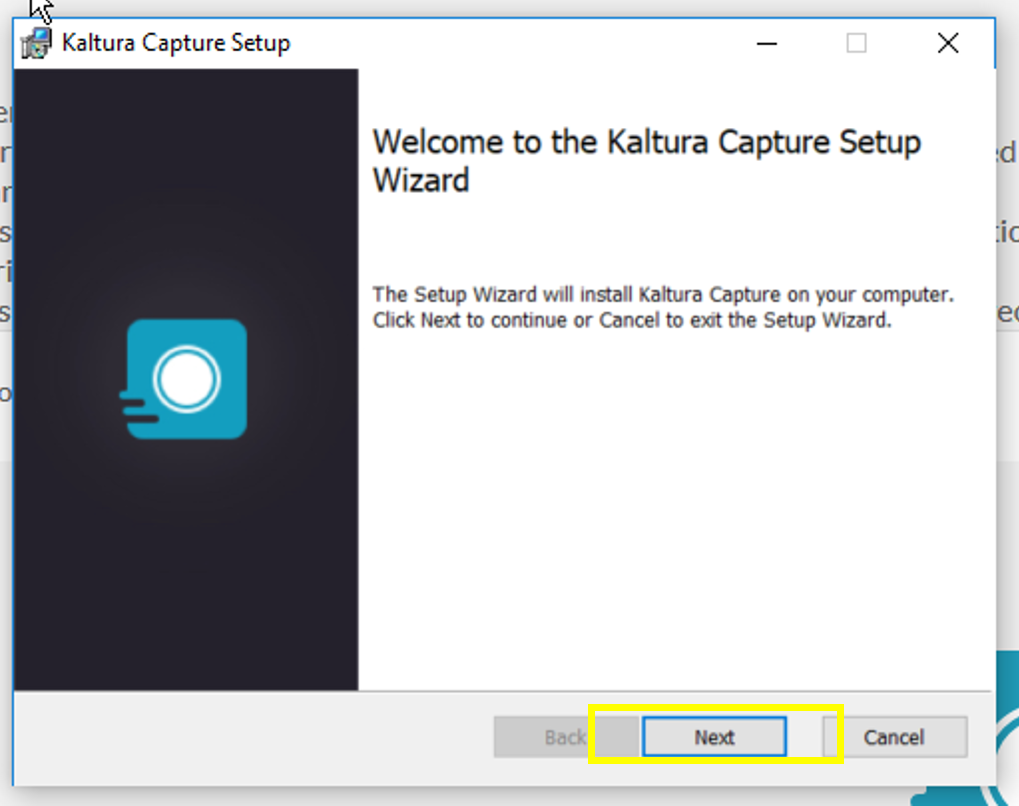
    Select “Next” in the installation tool.

    The Next button in the Kaltura Capture Setup window.

    During the installation phase, the service suggests a folder from the C drive as the primary storage location for recordings. It is worth changing the folder to one that is easy to navigate to later. You can write or copy this path to another folder of your choice.

    A field in Kaltura Capture Setup where you set the storage location for the recordings. There is a Next button at the bottom of the window.

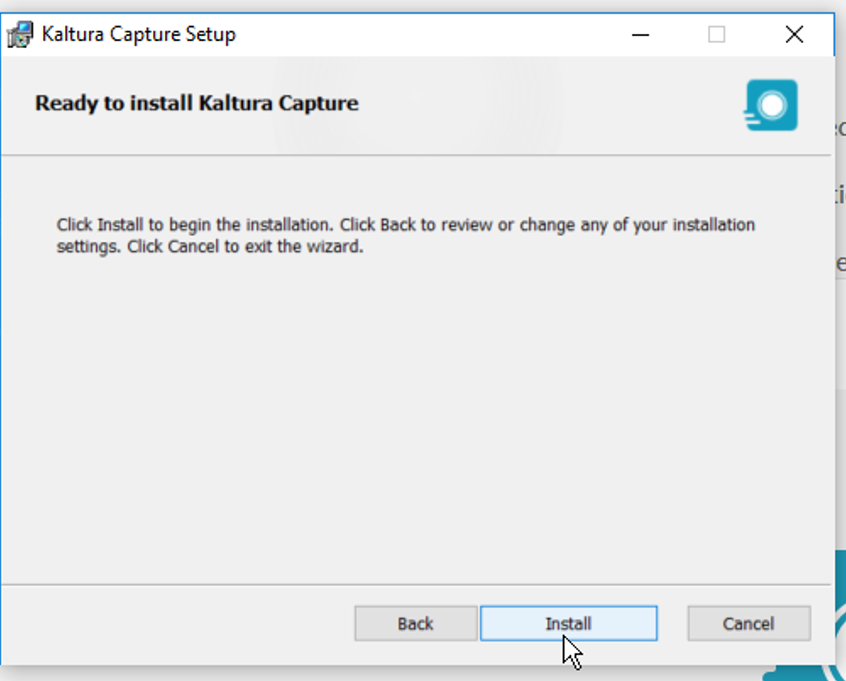
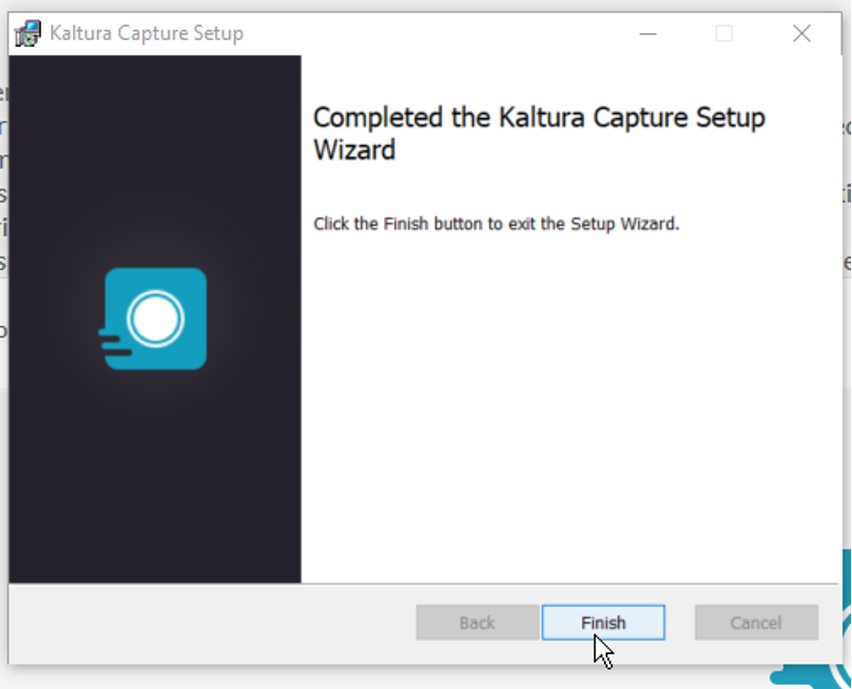
    Select Install and the installation can begin. Select Finish and the installation is complete.

    Kaltura Capture Setup Install button.
    Kaltura Capture Setup's Finish button.

    Note To open Kaltura Capture after installation, select Kaltura Capture from the Add new button again and accept the terms of use again. The application will start in a moment.

    Where are the captured videos saved on the computer?

    More information: https://digipedaohjeet.hamk.fi/ohje/kuvaruutukaappaus-kaltura-personal-capture-sovelllus/#Mihin_tallenteet_menev%C3%A4t_kontoktotelella?

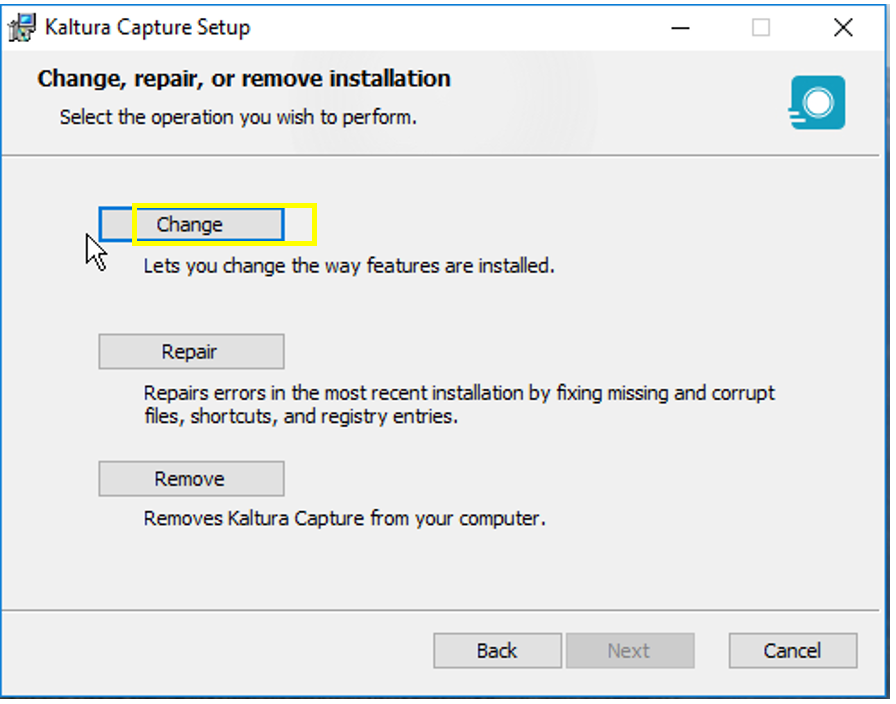
    Reconfiguring the Kaltura save folder

    If you later want to change the folder, you will have to start the installation of the tool again. You can set the folder again by pressing the Change button.

    ­­Kaltura Capture Setupin Change-painike.

    Last Updated: 2 months ago
    in Kaltura, Video production
    Tags: installation, Kaltura, personal capture, screen capture, software, video, Video production
    Oliko artikkeli hyödyllinen?

    Related Articles

    • The student returns the Kaltura video to the Moodle assignment
    • Using Kaltura videos in Moodle
    • Kaltura Hotspots
    • Kaltura Express Capture
    • Sorting and searching for Kaltura's own videos from the My Media listing

    Footer

    Häme University of Applied Sciences
    (HAMK) / PO Box 230 13101 Hämeenlinna Finland
    03 6461
    HAMK@HAMK.FI

    Privacy policy
    Cookies
    Takedown request
    Accessibility summary
    Site map

    cc-lisenssi

    This material is CC licensed Attribution-ShareAlike 4.0 International.