• Skip to primary navigation
  • Skip to main content
  • Skip to footer
Digipedaohjeet

Digipedaohjeet

  • Suomi
MENUMENU
  • Home
  • Planning
        • Planning and administration of teaching
          • Digipedagogical tips for everyday e-learning
          • Design quality for module implementation
          • Show all
        • Module implementation plan
          • Design quality for module implementation
          • Quality criteria for module implementations
          • Storyboard for module implementation
          • Blueprint for module implementation
          • Feedback and development
          • Show all
        • Planning and building Moodle workspace for module
          • Learning activity or assignment template
          • Show all
        • Planning online meeting
          • Logging in to HAMK’s Zoom
          • Zoom Online Meeting Service
          • Zoom LTI Pro Activity in Moodle
          • Show all
  • Teaching and guidance
        • Online teaching and studying
          • Digipedagogical tips for everyday e-learning
          • Log in to HAMK Services
          • Quality criteria for module implementations
          • Show all
        • Online meetings
          • Log in to HAMK Services
          • Zoom Online Meeting Service
          • Joining a Zoom meeting
          • Adding Zoom Activity to the Moodle Course Area and Scheduling Meetings (Fall 2020>)
          • Zoom LTI Pro Activity in Moodle
          • Show all
        • Online exams
          • EXAM for electronic individual exams and maturity tests
          • Show all
        • Learning platforms
          • Moodle: Student’s Guide
          • Moodle’s assignments
          • Moodle’s discussion forums
          • Zoom Online Meeting Service
          • Show all
        • Online teamwork
          • Moodle’s discussion forums
          • Show all
        • Communication
          • Moodle’s discussion forums
          • Show all
        • Data protection
          • Short check list for processing personal data
          • What is personal data and specific (sensitive) personal data?
          • Filming and photography permits in teaching
          • Privacy Protection of Zoom
          • Data protection – informing the data subject
          • Show all
  • Content production
        • Video production
          • Kaltura Video Platform
          • Kaltura’s upload and share your video
          • Show all
        • Questionnaires
          • Webropol-survey and reporting tool
          • Show all
  • Content sharing
        • Sharing content
          • Kaltura’s upload and share your video
          • Funet FileSender file sharing service
  • ⬅

Using Moodle’s image gallery


Kuuntele

Using Moodle’s image gallery

Article sections


    Kuuntele

    In the Moodle workspace, it is possible to create image galleries as Lightbox gallery material, from which users can easily browse photos. By default, students can also add pictures to the gallery.

    Adding pictures and comments

    1. Adding an image: press Add image and select the desired image file.
    2. Adding a comment: press Add comment and send the desired comment.
      • The comments are not image-specific, but appear below the image gallery.
    Moodle's image gallery view and its buttons.

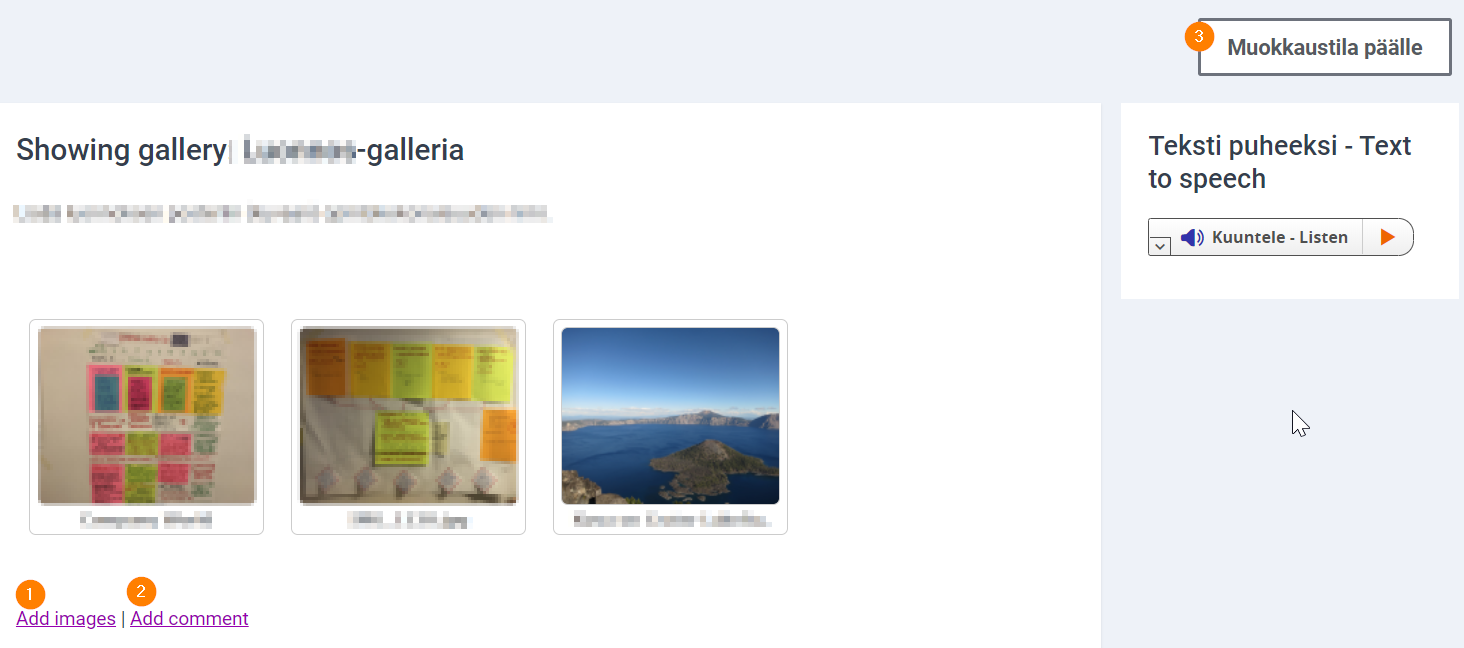
    3. Adding a caption to a picture, editing and deleting pictures (if allowed by the teacher): press the Editing mode on button.

    The different functions of the image. Functions include Caption, Delete, Flip, Resize, Rotate, Tag and Thumbnail.

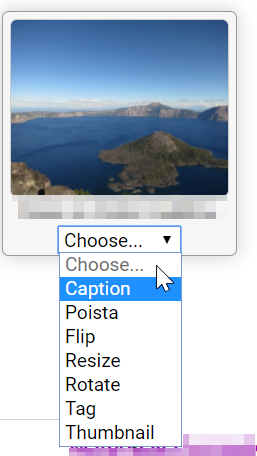
    Choose the function you want for the picture you want.

    Adding a photo gallery (teacher’s guide)

    Turn on editing mode in workspace. Add the Lightbox gallery material to the place you want. Under advanced settings, check the following:

    • do you want students to add a caption to the image and have it appear in full? Select yes for Display full caption text.
    • do you want students to post comments? Select yes for Allow comments.
      • the comments are not image-specific, but appear below the image gallery.
    the Rights button under the cogwheel menu.

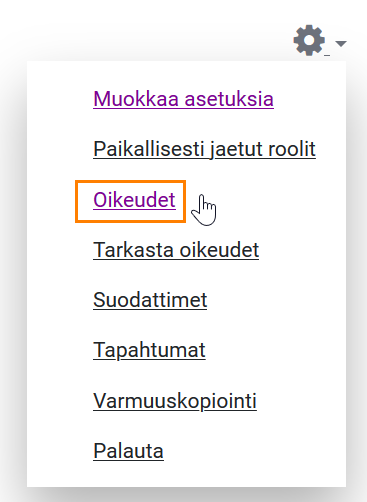
    If you don’t want students to be able to, for example, edit picture names, add captions or delete pictures, check the activity-specific setting in the gallery settings from the gear button.

    Select Rights, find the Lightbox gallery material section and remove the student role from the Edit a lightbox gallery section. Note the setting only applies to this individual gallery.

    Editing rights. There is a trash can button next to each role.

    Last Updated: 9 months ago
    in Moodle
    Tags: Moodle
    Oliko artikkeli hyödyllinen?

    Related Articles

    • Building a Moodle workspace: adding assignments and content
    • Adding users to Moodle workspaces
    • H5P tasks can be used flexibly from the content bank
    • Moodle evaluation matrix
    • Moodle groups and groupings

    Footer

    Häme University of Applied Sciences
    (HAMK) / PO Box 230 13101 Hämeenlinna Finland
    03 6461
    HAMK@HAMK.FI

    Privacy policy
    Cookies
    Takedown request
    Accessibility summary
    Site map

    cc-lisenssi

    This material is CC licensed Attribution-ShareAlike 4.0 International.