Kaltura Video Editor

Article sections
With Kaltura’s video editor, you can make small edits to the videos you upload to the service, e.g. by cutting out unnecessary parts from them.
Use Kaltura Video Editor when:
- you want to cut the video from the beginning, end or middle.
Quick guide:
- At the kaltura.hamk.fi address, select My Media under the Login button or under your own name. Log in to the service if necessary.
- Select the video you want to process from the list and select the pen function on the right side of the line
- Select Launch Editor
- Make the necessary trimmings for the video. You can remove material from the beginning, end and middle of the video and add a fade effect to the beginning/end in the middle of video clips.
- Save over a previous video or save as a new video
__________________________________________________________________________________
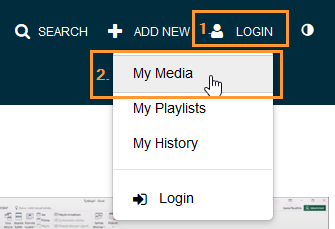
1. At kaltura.hamk.fi, select the Login button or My Media under your name. Log in to the service if necessary.
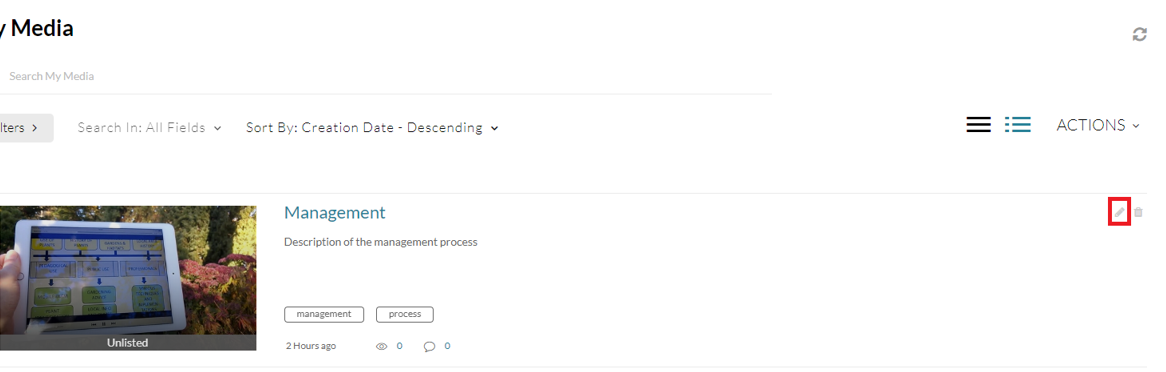
2. Select the video you want to edit from the list and select the pencil button after it.
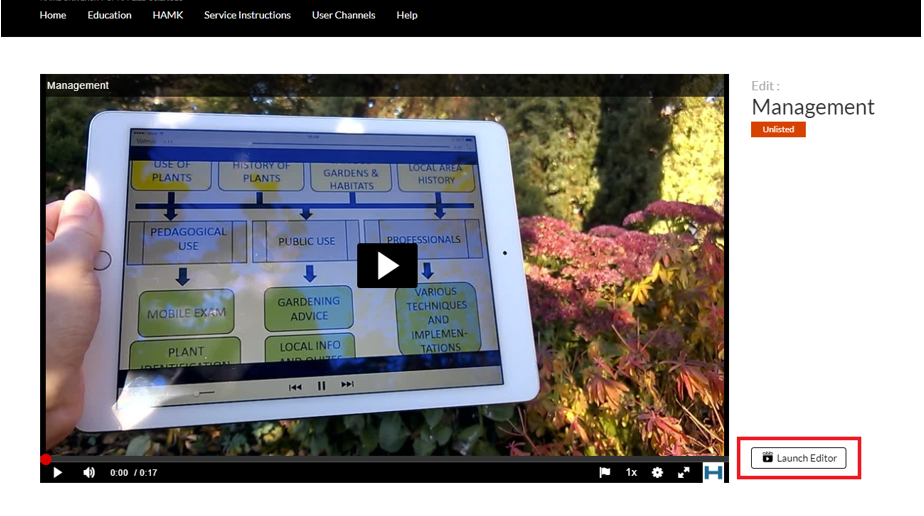
3. Select Launch Editor.
4. Video editing
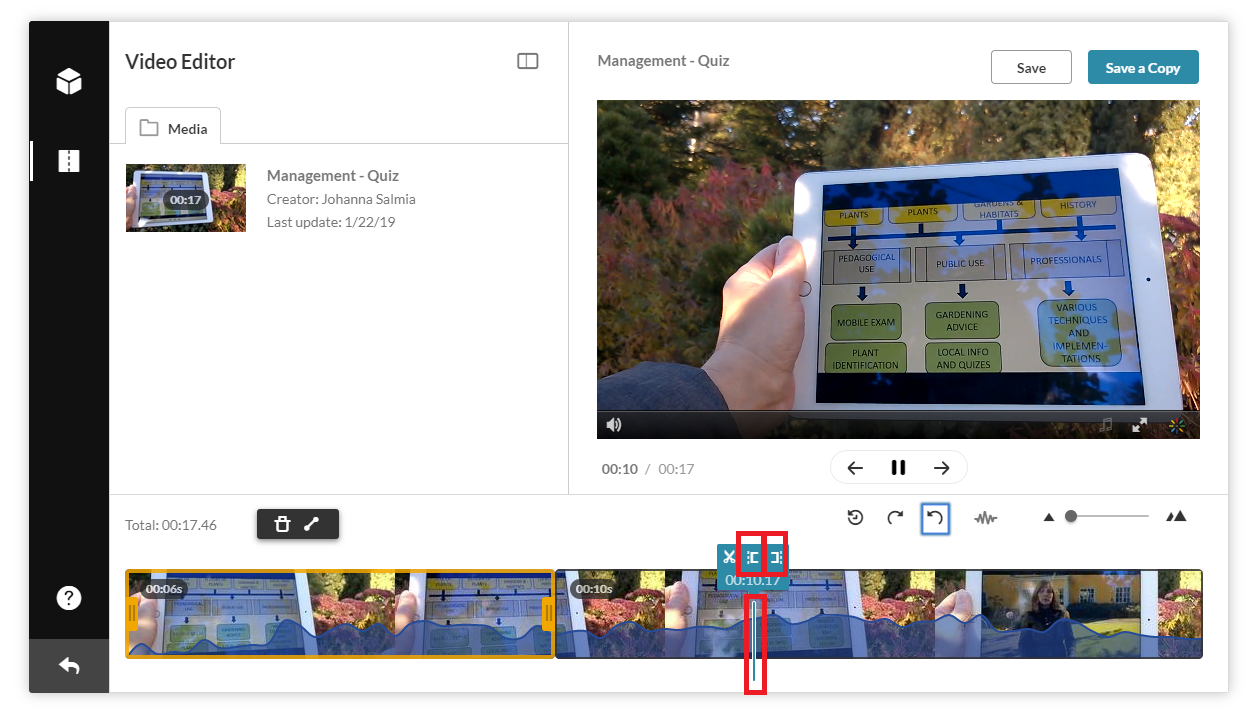
Split video into parts
- Find the right point in the video where you want to split the video in half. Move the cursor, i.e. the vertical line, to this point. For example, you can watch a video and stop it at a suitable point.
- Click the Split function, i.e. the scissors icon. The video splits in two at the cursor position.

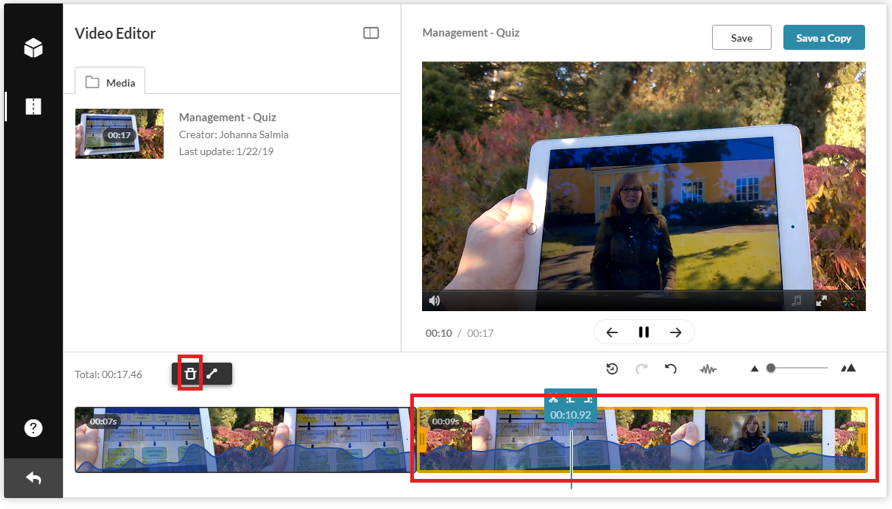
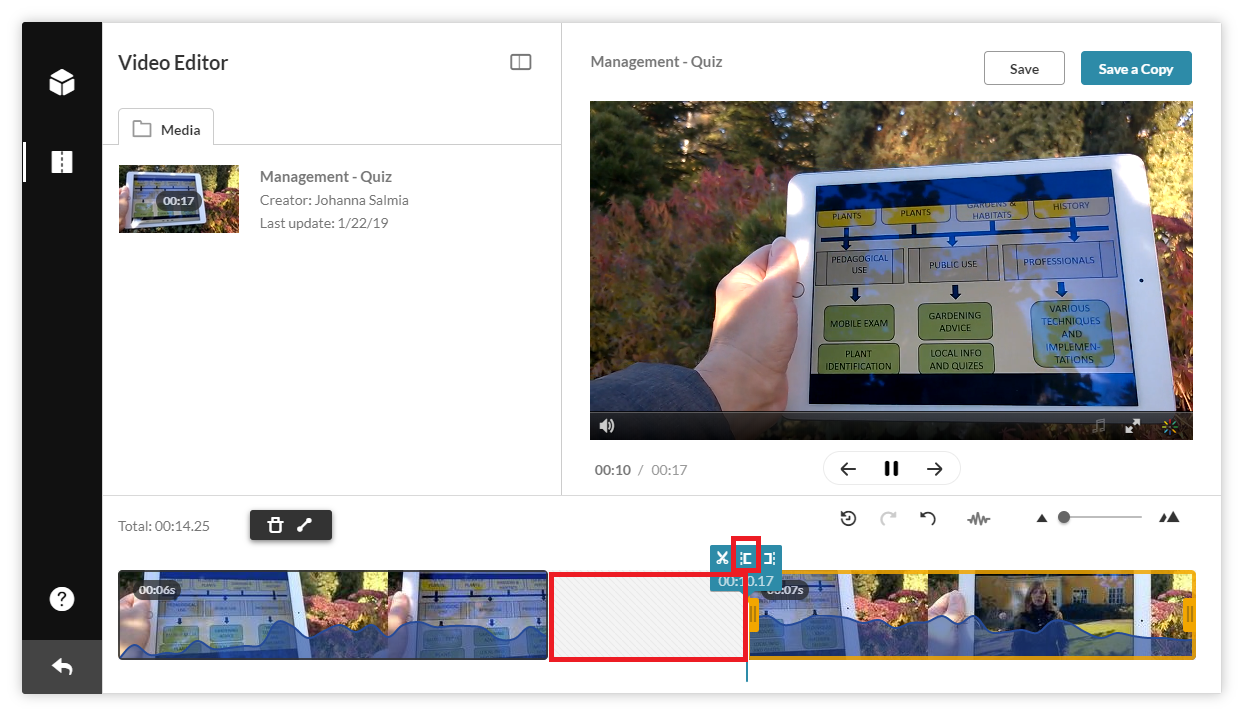
Deleting the selected video clip
- Select a video clip by clicking on it. If you want to remove a part of the video in the middle, cut the video according to the instructions in the previous section at the right points. After that, click on the clip of the video you want to delete. Orange borders suddenly appear on selected ideas.
- Click the Delete function, i.e. the trash icon. The selected video clip disappears from the timeline.
- You can also trim the material from the beginning or end of the clip using the handles that appear on the right and left side of the orange box.
Removing the beginning or end of a video clip
- Alternative ways
- Select a video clip by clicking on it. Orange borders appear in the video clip. Shortening the video from the beginning or the end is done by keeping the mouse down on the orange end of the beginning or the end and simultaneously dragging to shorten the video.
- Move the cursor to the desired position in the video clip. Remove the beginning or end of the video using the Set In (beginning) or Set Out (end) function. You can drag the selected video clip with the mouse to another video clip so that there is no gap between.
Other functions
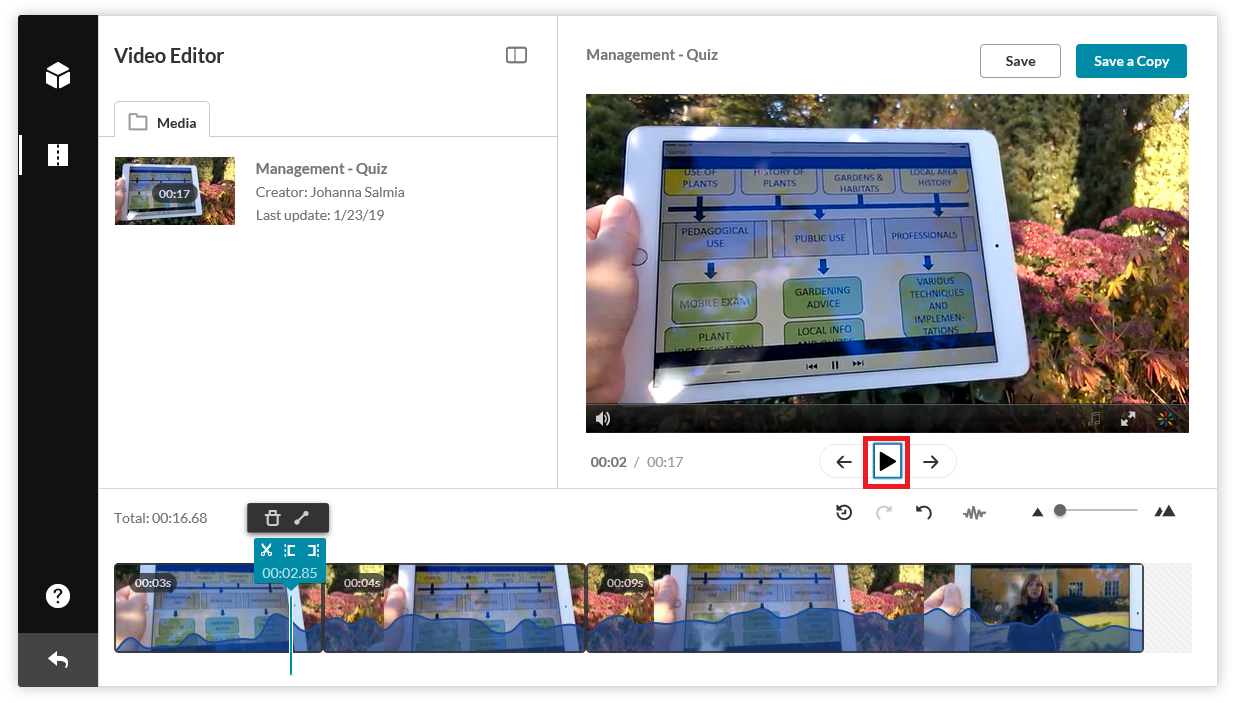
The video can be previewed after editing before saving with the Play function.
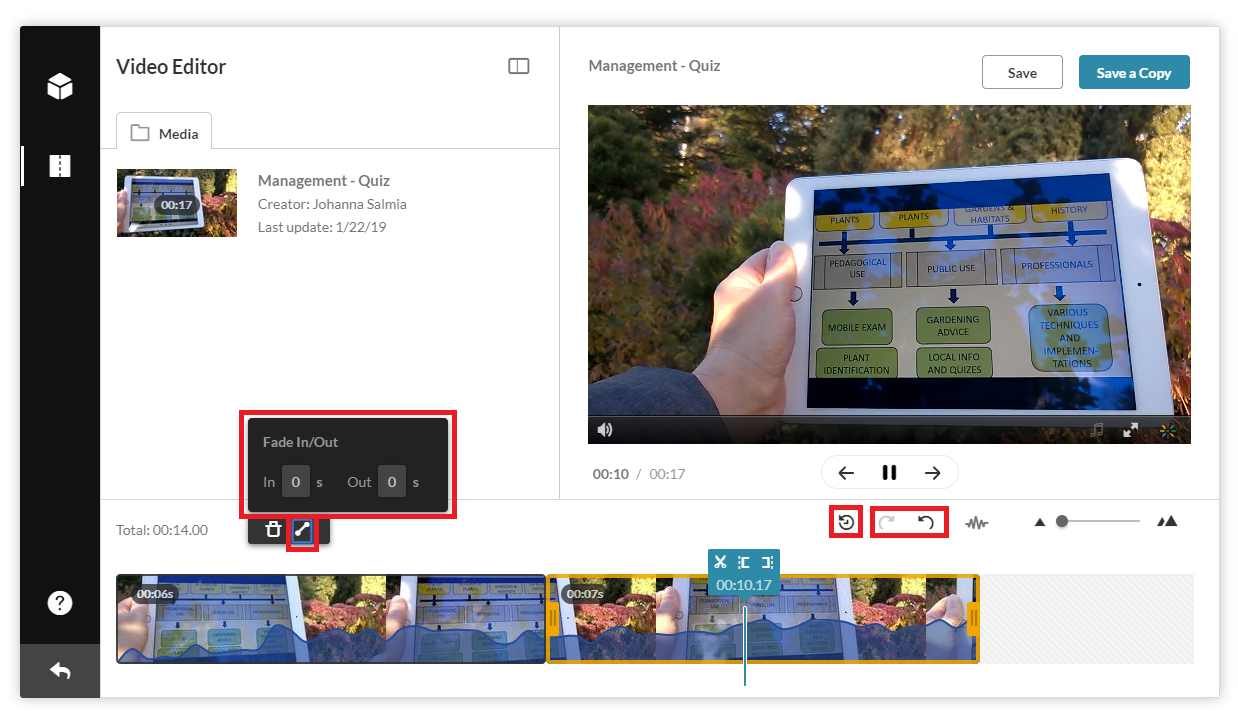
- The Fade In and Fade Out functions can be used to fade out the video image from the beginning or end of the video clip by specifying the desired time period in seconds.
- All changes can be canceled with the Reset function (clock image).
- The Redo (curved right arrow) and Undo (curved left arrow) functions can be used to restore and undo the last change made.
5. Saving
With the Save function, the edited video is saved over the original. The video edited with the Save a Copy function is saved as a new video and the original is kept. The recording may take a long time – you can exit the editing view already during the recording.
