• Skip to primary navigation
  • Skip to main content
  • Skip to footer
Digipedagogical guidelines

Digipedagogical guidelines

  • Suomi
MENUMENU
  • Home
  • Planning
        • Planning and administration of teaching
          • Digipedagogical tips for everyday e-learning
          • Design quality for module implementation
          • Show all
        • Module implementation plan
          • Design quality for module implementation
          • Quality criteria for module implementations
          • Storyboard for module implementation
          • Blueprint for module implementation
          • Feedback and development
          • Show all
        • Planning and building Moodle workspace for module
          • Learning activity or assignment template
          • Show all
        • Planning online meeting
          • Logging in to HAMK’s Zoom
          • Zoom Online Meeting Service
          • Zoom LTI Pro Activity in Moodle
          • Show all
  • Teaching and guidance
        • Online teaching and studying
          • Digipedagogical tips for everyday e-learning
          • Log in to HAMK Services
          • Quality criteria for module implementations
          • Show all
        • Online meetings
          • Log in to HAMK Services
          • Zoom Online Meeting Service
          • Joining a Zoom meeting
          • Adding Zoom Activity to the Moodle Course Area and Scheduling Meetings (Fall 2020>)
          • Zoom LTI Pro Activity in Moodle
          • Show all
        • Online exams
          • EXAM for electronic individual exams and maturity tests
          • Show all
        • Learning platforms
          • Moodle: Student’s Guide
          • Moodle’s assignments
          • Moodle’s discussion forums
          • Zoom Online Meeting Service
          • Show all
        • Online teamwork
          • Moodle’s discussion forums
          • Show all
        • Communication
          • Moodle’s discussion forums
          • Show all
        • Data protection
          • Short check list for processing personal data
          • What is personal data and specific (sensitive) personal data?
          • Filming and photography permits in teaching
          • Privacy Protection of Zoom
          • Data protection – informing the data subject
          • Show all
  • Content production
        • Video production
          • Kaltura Video Platform
          • Kaltura’s upload and share your video
          • Show all
        • Questionnaires
          • Webropol-survey and reporting tool
          • Show all
  • Content sharing
        • Sharing content
          • Kaltura’s upload and share your video
          • Funet FileSender file sharing service

ThingLink as a part of a PowerPoint presentation


Kuuntele

ThingLink as a part of a PowerPoint presentation

banner image tools for creating

Article sections


    Kuuntele

    After the beginning of 2022, ThingLink allows embedding interactive content into a PowerPoint presentation. The possibility is now available for HAMK’s personnel.

    How to embed content
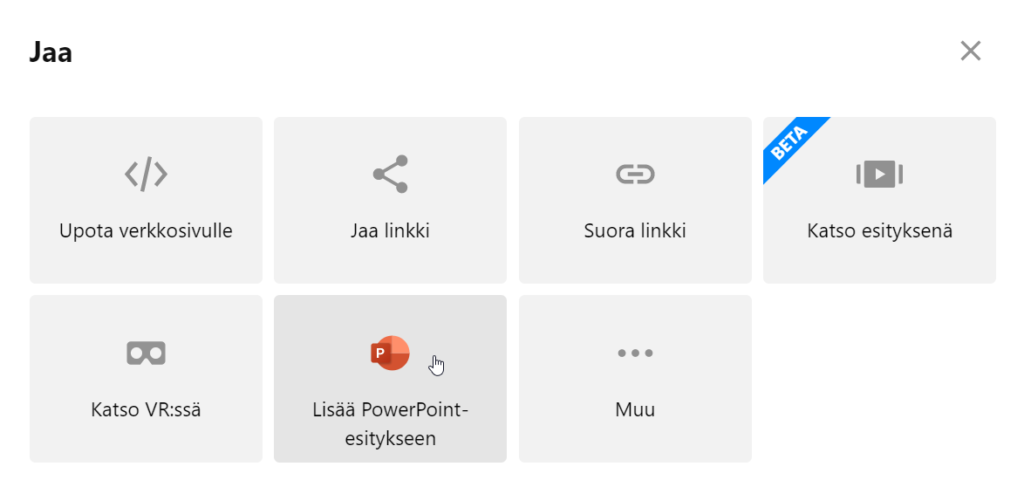
    Let’s get the embed link first. Sign in to ThingLink and open the pre-generated content you want to embed into a presentation. Then click the “Share” button at the top-right corner and select “Add to the PowerPoint-presentaton” in the pop-up window that opens. Then copy the link to the media.

    Figure 1: Getting an embed link from ThingLink.

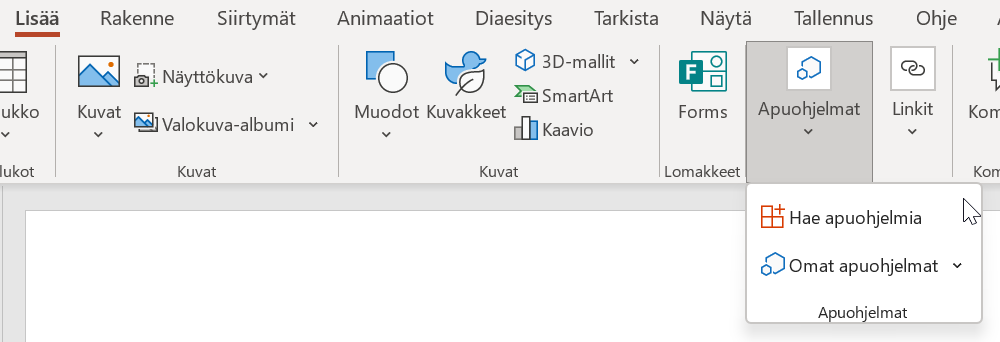
    Next, let’s insert the embedding into PowerPoint. Open your presentation in the PowerPoint desktop application and go to the slide where you would like to add content. On the “Insert” tab on the ribbon, open “Add-ins”.

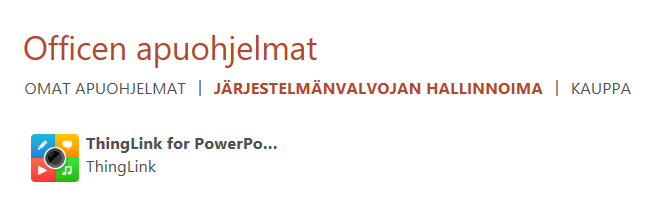
    The first time you use embedding, you must get the Add-in. Select “Get Add-ins” (Fig. 2). In the opening pop-up window select the tab “Admin Managed”, under which the ThingLink icon should appear (Fig. 3). Select the icon and press “Add” and then the embed window will pop up and you can add a ThingLink-link. The embed should now appear.

    In the future, the ThingLink add-in can be found right in your PowerPoint app behind the “My Add-ins”-menu (Figure 2).

    Figure 2: Search for add-ins in PowerPoint.
    Figure 3: ThingLink Add-in icon.

    Please note that embedding requires an Internet connection. More information about the feature can be found on the ThingLink website.

    More guidance from ThingLink

    • Thinglink – interactive learning experience

    Last Updated: 2 months ago
    in Tools for creating learning materials
    Tags: embed, embedding in powerpoint, infographic, interaction, learning materials, Opettaja, PowerPoint, sharing material, thinglink, visuality
    Oliko artikkeli hyödyllinen?

    Related Articles

    • Using ThingLink content in Learn-Moodle
    • ThingLink – interactive learning experience
    • Easy Accessibility -weekly tips
    • Embedding Videos to Moodle as Kaltura Video Resource

    Footer

    Häme University of Applied Sciences
    (HAMK) / PO Box 230 13101 Hämeenlinna Finland
    03 6461
    HAMK@HAMK.FI

    Privacy policy
    Cookies
    Takedown request
    Accessibility summary
    Site map

    cc-lisenssi

    This material is CC licensed Attribution-ShareAlike 4.0 International.